MagBound® Time Lock FAQ: Your Tech Guide to Safe & Smooth Solo Play
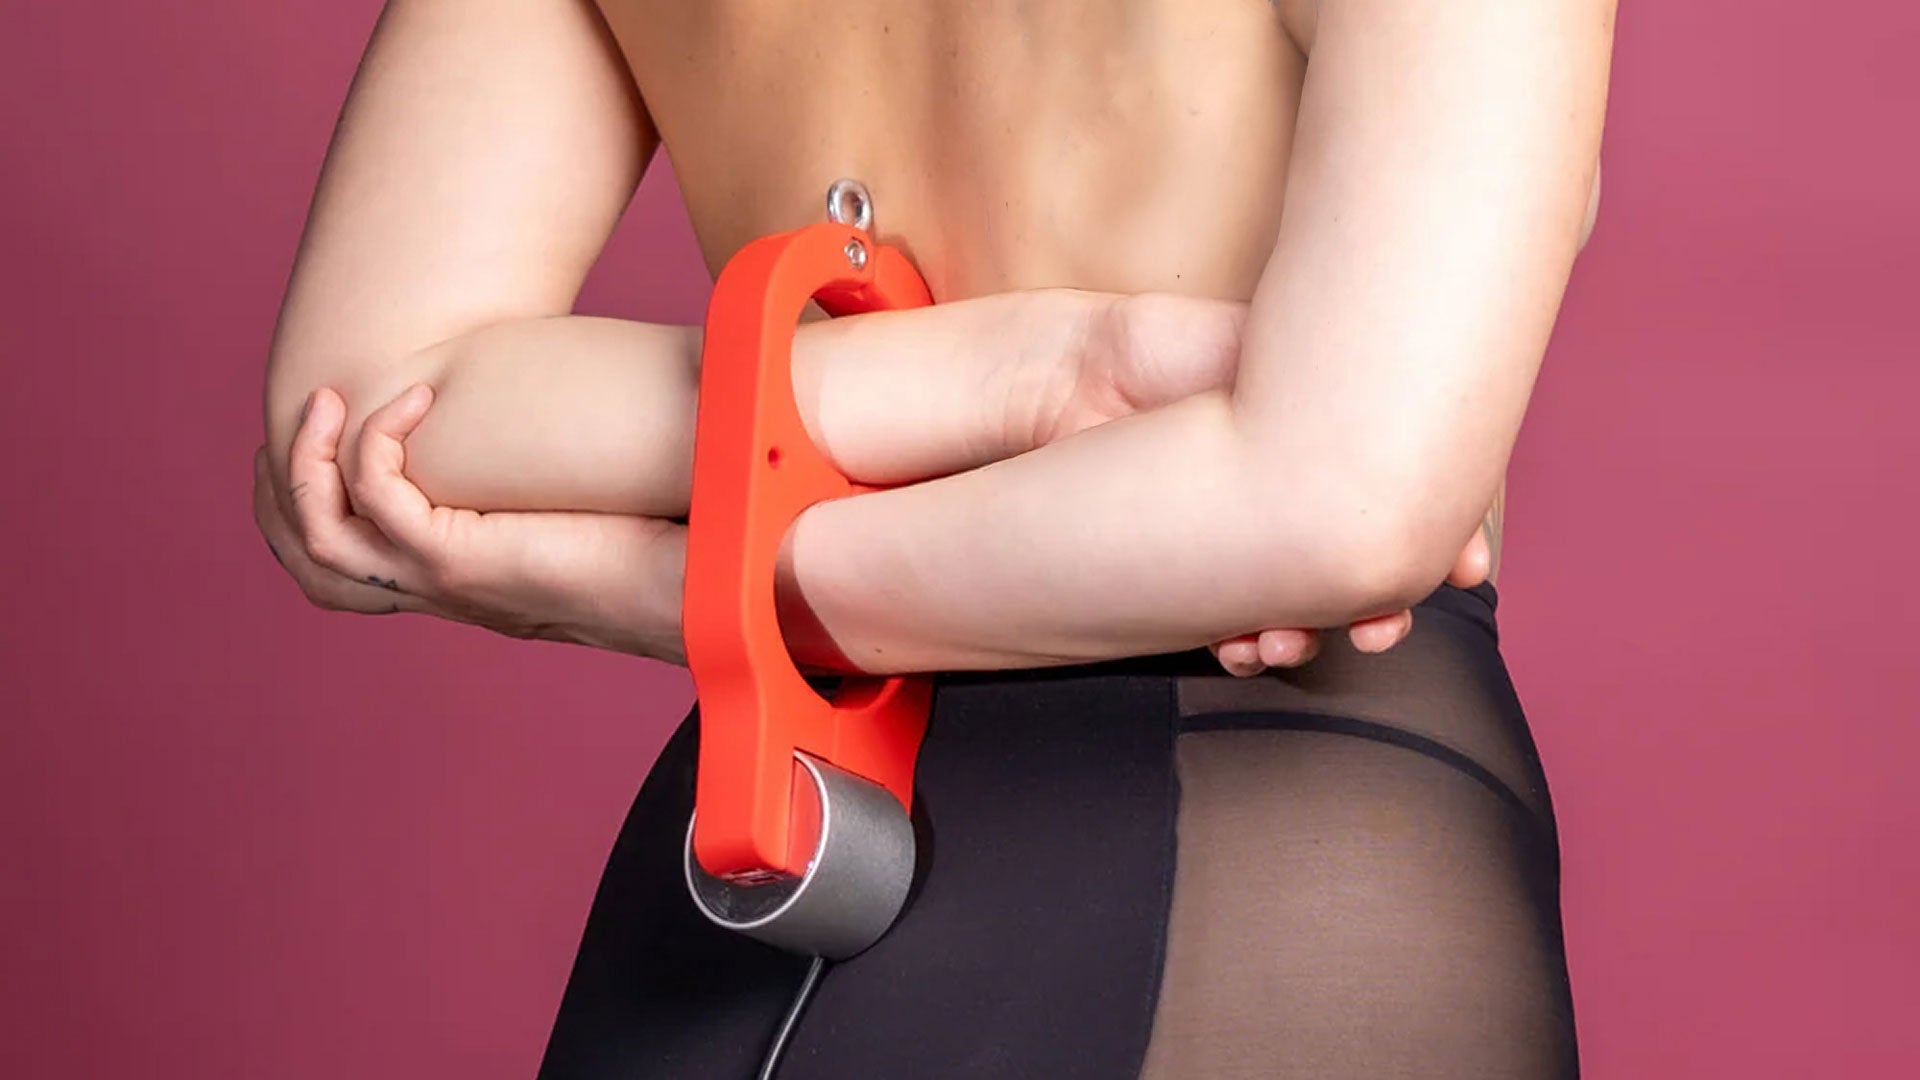
The MagBound® is our signature magnetic time lock, designed for hands-off, self-controlled bondage sessions, with a crucial fail-safe for your security. Because the device is technical and used in many setups, users often have recurring questions. This guide explains common problems, essential safety features, and practical fixes, so your MagBound® experience stays as smooth as possible.
Replacement Parts: What Can Be Ordered Separately?
- MagBound® lock (sold individually, not as a set)
- MagBound® USB cable (converter cable or standard USB-C)
- Replacement anchor disks (eyelet plate)
Essential Safety & How MagBound® Actually Works
- MagBound® is “fail-safe”:The lock stays closed only as long as it receives power. If the power supply fails (for example, if the powerbank runs out), the lock will automatically open. This is a critical safety feature.
- Always use a powerbank: For real safety, the lock must be powered continuously by a powerbank and cable during use. Do not use a common wall plug for bondage play - the fail-safe only works with battery power!
-
What happens if I pull the cable? As power is disconnected the lock will open. To prevent this from happening "accidentally" during your session, the right setup is important.
- Check out this YouTube video for a demonstration of a solid desk setup.
- Tip: Form a loop at the end of the cable and secure it out of reach with a cable tie. You can also run the cable through a chain or tie it somewhere secure, the cable is sturdy enough not to break by hand.
Troubleshooting: Common Problems & Solutions
1. The Lock Won’t Close - What Should I Do?
- Check power supply: Test the setup first using a USB wall plug (for testing only, not for bondage use, as fail-safe is disabled!).
- Test your USB cable: If you have a timer with a USB-C connection, try a standard USB-C cable. Older setups used a USB converter cable to convert 5V to 8.2V for the lock, but these cables can be unreliable.
-
If the lock still won’t close: The lock may be defective, please send it in for repair.
- If within one year of purchase: free repair.
- If between one and two years: support will review the case (e.g. cable condition); the repair may be free or charged (approx. €40–€60).
2. Retro Timer & Smart Timer: FAQs
Retro Timer
- Random mode:
- See the manual (p. 24–25) for details, double click for 30–100%, triple click for 50–100% of time range.
- Strange display or error symbols:
- The device may be defective, please send it in for repair.
Smart Timer
Smart Timer Remote Connect (V2) is being sold as stock software since May 2026. It features a modern user interface with a circular clock. If you see a simple countdown, you have V1.
Smart Timer Remote Connect V2 (after April 2026)
-
Two modes:
- Standalone mode: The timer creates its own WiFi network. You connect to it, but will lose your internet while connected.
- WiFi mode: First connect via standalone, then enter your home WiFi details. After reboot, you will see a device ID. After creating an account and inputting the ID, you can connect to your smart timer or give access to other persons.

-
Connection problems:
- Standalone: Double-check your password and WiFi connection, or try another browser/device.
- WiFi mode: If the blue LED is steady and the “Smart Timer…” WiFi doesn’t show up, the timer is likely connected to your network. If it restarts its own WiFi, your access data was incorrect or your WiFi password had problematic special characters.
-
Can't find device:
- You need to know your device-ID and link it to your account. If you missed the screen, push the reset button. The device will enter into standalone mode again, so you can log into its wifi
- You can retrieve the device-ID here: Settings → About → Device-ID
- Repeat the Wifi-mode setup steps above
-
I don't want to create an account
- You can still use the Standalone mode without the device communicating with our servers. If you want to use it in Wifi mode without an account, please downgrade to V1
-
Device already registered
- If you want to use it with another account, you need to unregister it from the old one first (for security reasons, it can only be registered to a single account).
- log into your old account and hit unregister
Smart Timer V1 (sold before May 2026)
-
Two modes:
- Standalone mode: The timer creates its own WiFi network. You connect to it, but will lose your internet while connected.
- WiFi mode: First connect via standalone, then enter your home WiFi details. After reboot, the timer connects to your network. You need the IP address your router assigns (see manual p. 18–19).
-
How to find the IP address:
- Check your router’s “connected devices” list, or use Windows network overview and “Open device webpage.”
-
Connection problems:
- Standalone: Double-check your password and WiFi connection, or try another browser/device.
- WiFi mode: If the blue LED is steady and the “Smart Timer…” WiFi doesn’t show up, the timer is likely connected to your network. If it restarts its own WiFi, your access data was incorrect or your WiFi password had problematic special characters.
-
Timer resets itself:
Usually solved by a firmware update.
-
How to update:
- For older timers (before 2025): To get the latest updates, contact support by email.
- Upload the firmware file first, wait for restart, then upload the filesystem file (see manual, p. 20).
- Note: After update, all saved access data is deleted and the timer returns to standalone mode.
- You can download the latest update here: Smart Timer Update
-
Update does not work:
If the update process does not work, try trouble shooting the connecting input:
|
|
|
|
|
|
|
|
|
|
|
|
3. Dual Adapter Issues
-
“Doesn’t work?”
- Double-check your setup using the product images for reference.
- Test both USB adapters and the timer separately, then together.
- Both powerbanks must be turned on (some have a power button).
Key Safety Reminders
- Always use a powerbank for bondage solo play, it’s the only way to ensure fail-safe works.
- Regularly check all cables and connections before use.
- Never use MagBound® to support body weight or in any way that could cause injury when it falls.
- Never use the lock on your neck, especially when alone.
- Backup/emergency release is a must for all experimental setups, always have a way out.
- For more tips: See our YouTube channel or join our Discord.
Having an issue not covered here? Reach out to our support team or connect with the community - we’re here to help!
Note:
For full technical details, step-by-step guides, and all wiring diagrams, see the official MagBound® manual (PDF).

